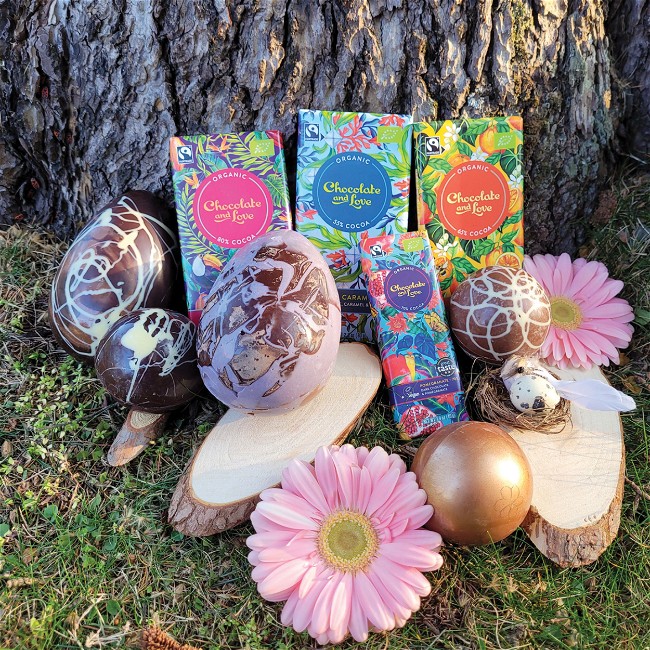
Dark Chocolate Easter Eggs
Written by Wendy Macfarlane
•Posted on April 08 2022

Category
Dessert
Servings
7
Prep Time
45 minutes
Cook Time
10 minutes
Silky, delicious, exciting, Easter eggs for the festive holiday.
We have the perfect recipe to create your very own Easter Eggs to hide, making each discovery a very exciting one for your loved ones! Decorate them with whatever colours you like and make things extra special this Easter.

Ingredients
-
For this recipe you will need Easter egg moulds. Shop a few different kinds here: https://www.amazon.co.uk/easter-egg-moulds/s?k=easter+egg+moulds
-
200g Chocolate and Love Milk Hazelnut 50% dark chocolate
- 200g Chocolate and Love Creamy Dark 55% dark chocolate
- 100g Chocolate and Love Sea Salt 55% dark chocolate
Equipment
For the Easter Eggs
Directions
Wash each side of your egg mould with hot, soapy water and a sponge, then dry. Using a ball of cotton wool, buff the inside of the mould. The shiner your mould is, the shiner your chocolate will be.
Melt, then temper your Milk Hazelnut 50% dark chocolate. *See tip below on tempering.
Brush graphic stripes of chocolate onto the moulds. Go over some stripes twice, to make the colours pop out.
Repeat the melting and tempering process with the Creamy Dark 55% dark chocolate.
Line a baking sheet with parchment paper. Melt and temper the Sea Salt 55% dark chocolate.
Half-fill one mould with the chocolate, then move it around to completely cover the mould.
Pour the excess back into a bowl, and scrape a palette knife across the mould to clean it up. Repeat with the other half of the egg.
Set the moulds, flat-side down, on the lined baking sheet. Move to the fridge and leave to set for about 10 minutes.
Once they are set, remove them from the moulds.
Heat an oven tray, and use this to rub the flat side of your chocolate eggs to melt them just enough so they will stick together, forming a whole, round egg.
Tempering
Break up 3/4 of your chocolate into a heatproof bowl. Melt until it is smooth. Add the rest of your chocolate, chopped into small pieces. Stir with a spatula until the pieces have melted. This can take a while, so have patience and keep stirring. Use as soon as possible. If the chocolate starts to get too cold and thick as you use it, heat for just a few seconds and stir well.
Tips & Tricks
To achieve a more artistic look, you can replace one of the above chocolates with a white chocolate of your choice. See the pictures for reference.
Comments
0 Comments
Leave a Comment